
IPEVO Visualizer
For Document Cameras
All Features
Select an operating system from the drop-down list below to learn more about the respective features that are available.
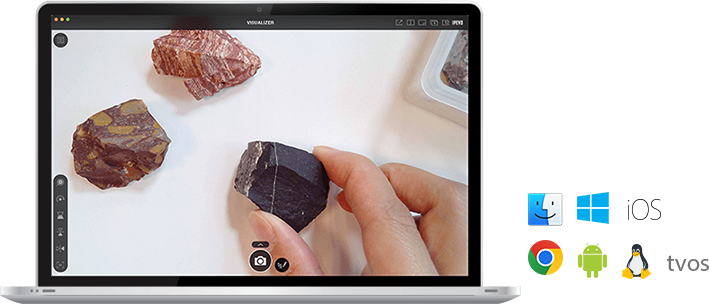
Macos / Windows
iOS
Android
tvos
Chrome

Select Camera
Here, you can choose a camera device and adjust its live image to better fit your needs.

Zoom
Visualizer offers zoom for hard-to-read text or fine details.

Rotate & Mirror
Use this to rotate the live image for a full 360-degree, or flip/flop the image for a mirror effect.

Resolution & Ratio
A range of resolutions is available for your selection. You can also choose a viewing ratio that best fits your screen resolution.

Exposure
The default exposure often works best, but you can also lower it for a clearer image when capturing digital screens, or increase it when capturing under low-light environment.

White Balance
Adjust and lock the white balance to remove unrealistic color casts and to make images look more natural under different lighting environments.
Note: White balance adjustment is only available on selected IPEVO document cameras.

Video Filters
Take advantage of Visualizer’s video filters to make your lessons or presentations friendly and engaging for the visually impaired.

Gridlines
Press to show gridlines. This helps you to align your material.

Freeze
With freeze, Visualizer pauses the live stream until you tell it to unfreeze.

LED Light Button
Turn your camera’s built-in LED light on or off with a single press.
Note: LED light button is only available on selected IPEVO document cameras.

Reading Aids
With this, you have additional tools such as line marker, highlight strip, magnifier and masking to aid you in reading books, magazines, documents and more.
Note: Reading Aids is only functional in Snapshot and Video Recording mode.

Snapshot
Take a snapshot using your camera. And with the newly added “Annotation” feature, you can now first annotate on the live image before taking a snapshot of the annotated image.
Note: The Annotation feature is only functional in Snapshot/Live View mode.

Video Recording
With Video Recording, you can record your material as it streams live. You can even pause, mute, or take snapshots during your recordings.
Note: The highest resolution supported for video recording is being capped at 1920x1080.

Slow Motion Recording
Record in slow motion using this feature.
Note: The highest resolution supported for slow motion recording is being capped at 1920x1080.

Settings
Here, you can access general settings such as camera sounds, file saving location, file naming format, and additional settings for taking snapshot, video recording, and more.

Time-lapse Shooting
With Time-lapse shooting, you can set a time interval and automate a shooting schedule for taking time-lapse video.

Scan QR Code/Barcode
Visualizer gives you the option to scan QR Codes or barcodes.

Open a New Window / Split Screen
When in windowed mode, press this to open a new Visualizer window. When in full screen, press this to change to split-screen mode. Either way, you can use more than one camera for side-by-side comparisons of different materials.
Note: High computer performance is required when more than one camera is connected at high resolutions. If the image freezes or lags in this setup, consider lowering the resolution. Do not use a USB hub for this purpose. If any of the screen does not display an image, try a different USB port on your computer.

Scan Document
You have a few options to scan your documents with this feature. You can go for auto-detection, or manually choosing the area you wish to capture. You can also choose to save the images as jpg or pdf files, change aspect ratios, and/or scan 2 pages at once.
Magnify
Press this to display a magnifier. You can then drag it around to magnify selected areas of your live image.
Note: By default, the highest resolution of your USB camera will be selected when you’re using Magnify mode. If the image freezes or lags, consider lowering the resolution.

Stop Motion
Create stop motion videos easily with this feature.

Focus Button
Pressing this allows you to focus the live image. It is particularly useful when you need a quick refocusing.

Picture-in-Picture
Picture-in-Picture (PiP) comes in handy for your live presentation or video recording. You can use the main window to show what you're working on and the pinned overlay window to show yourself talking it through.
Note: Picture-in-Picture is only available for macOS 10.12 or above, and is only functional in Snapshot, Video Recording, and Live Broadcast mode.

Split Screen
With Split Screen, you can connect two document cameras, either wired or wirelessly, to your computer and present in split-screen. Visualizer will create two panes for your live feeds, and you’ll be able to adjust them independently.
Note 1: Visualizer only supports wireless connection with IPEVO wireless document cameras.
Note 2: High computer performance is required when more than one camera is connected at high resolutions. If the image freezes or lags in this setup, consider lowering the resolution.

Full Screen
In Full Screen mode, the live image fills up the entire screen which makes it ideal for presenting or teaching.

Select Camera
Here, you can choose a wirelessly connected IPEVO wireless document camera and display its live image on your device.

Zoom
Visualizer offers zoom for hard-to-read text or fine details.
Note: To zoom in/out on the live image on your iPhone, please use the pinch-to-zoom gesture.

Exposure
The default exposure often works best, but you can also lower it for a clearer image when capturing digital screens, or increase it when capturing under low-light environment.

Rotate & Mirror
Use this to rotate the live image for a full 360-degree, or flip/flop the image for a mirror effect.

Resolution
A range of resolutions is available for your selection.
Note: Live Broadcast is only available for macOS 10.10 and above, and the highest resolution supported is being capped at 1280x720.

White Balance
Adjust and lock the white balance to remove unrealistic color casts and to make images look more natural under different lighting environments.
Note: White balance adjustment is only available on selected IPEVO document cameras.

Manual Focus
Visualizer’s manual focus gives you the ability to precisely fine-tune the focus right where you need it.
Note: Manual focus is only available on selected IPEVO document cameras.

Video Filters
Take advantage of Visualizer’s video filters to make your lessons or presentations friendly and engaging for the visually impaired.

LED Light Button
Turn your camera’s/device’s built-in LED light on or off with a single press.
Note: LED light button is only available on selected IPEVO document cameras and iPads/iPhones.

Freeze
With freeze, Visualizer pauses the live stream until you tell it to unfreeze.

Gridlines
Press to show gridlines. This helps you to align your material.

Focus Button
Pressing this allows you to focus the live image. It is particularly useful when you need a quick refocusing.

Snapshot
Take a snapshot using your camera.
Video Recording
With Video Recording, you can record your material as it streams live.
Note: The highest resolution supported for video recording is being capped at 1920x1080.

Time-lapse Shooting
With Time-lapse shooting, you can set a time interval and automate a shooting schedule for taking time-lapse video.

Full Screen
In Full Screen mode, the live image fills up the entire screen which makes it ideal for presenting or teaching.

Review Mode
Review mode allows you to view and manage snapshots and videos you’ve taken.
Select Camera
Here, you can choose a wirelessly connected IPEVO wireless document camera and display its live image on your device.
Zoom
Visualizer offers zoom for hard-to-read text or fine details.
Note: To zoom in/out on the live image on your iPhone, please use the pinch-to-zoom gesture.
Exposure
The default exposure often works best, but you can also lower it for a clearer image when capturing digital screens, or increase it when capturing under low-light environment.
Rotate & Mirror
Use this to rotate the live image for a full 360-degree, or flip/flop the image for a mirror effect.
Resolution
A range of resolutions is available for your selection.
Note: Live Broadcast is only available for macOS 10.10 and above, and the highest resolution supported is being capped at 1280x720.
White Balance
Adjust and lock the white balance to remove unrealistic color casts and to make images look more natural under different lighting environments.
Note: White balance adjustment is only available on selected IPEVO document cameras.
Manual Focus
Visualizer’s manual focus gives you the ability to precisely fine-tune the focus right where you need it.
Note: Manual focus is only available on selected IPEVO document cameras.
Video Filters
Take advantage of Visualizer’s video filters to make your lessons or presentations friendly and engaging for the visually impaired.
LED Light Button
Turn your camera’s/device’s built-in LED light on or off with a single press.
Note: LED light button is only available on selected IPEVO document cameras and iPads/iPhones.
Freeze
With freeze, Visualizer pauses the live stream until you tell it to unfreeze.
Gridlines
Press to show gridlines. This helps you to align your material.
Focus Button
Pressing this allows you to focus the live image. It is particularly useful when you need a quick refocusing.
Snapshot
Take a snapshot using your camera.
Video Recording
With Video Recording, you can record your material as it streams live.
Note: The highest resolution supported for video recording is being capped at 1920x1080.
Time-lapse Shooting
With Time-lapse shooting, you can set a time interval and automate a shooting schedule for taking time-lapse video.
Review Mode
Review mode allows you to view and manage snapshots and videos you’ve taken.

Switch User Interface
Press to switch to a simpler User Interface with larger icons that makes it easier for those with low vision to use.
Note: The highest resolution supported for video recording is being capped at 1920x1080.
Full Screen
In Full Screen mode, the live image fills up the entire screen which makes it ideal for presenting or teaching.
Zoom
Visualizer offers zoom for hard-to-read text or fine details.

Reading Aids
Use the line marker and magnifier to aid you in reading books, magazines, documents and more when you need it.
Exposure
The default exposure often works best, but you can also lower it for a clearer image when capturing digital screens, or increase it when capturing under low-light environment.
Resolution
A range of resolutions is available for your selection.
Rotate
Use this to rotate the live image.

Mirror
Flip or flop the live image for a mirror effect.
Gridlines
Choose from a range of gridlines to help you align your material.

Focus Button
Pressing this allows you to focus the live image. It is particularly useful when you need a quick refocusing.
Video Filters
Take advantage of Visualizer’s video filters to make your lessons or presentations friendly and engaging for the visually impaired.

LED Light Button
Turn your camera’s built-in LED light on or off with a single press.
Note: LED light button is only available for selected IPEVO wireless document cameras.

Reset Button
Press this to reset zoom, exposure, resolution, rotate, mirror and video filters to default.
Select Camera
Here, you can choose a camera device and display its live image on your screen.
Zoom
Visualizer offers zoom for hard-to-read text or fine details.
Rotate & Mirror
Use this to rotate the live image, or flip/flop it for a mirror effect.
Resolution
A range of resolutions is available for your selection.
Freeze
With freeze, Visualizer pauses the live stream until you tell it to unfreeze.
Reading Aids
With this, you have additional tools such as line marker, highlight strip, magnifier and masking to aid you in reading books, magazines, documents and more.
Note: Magnifier is only available when you're using a USB camera.

Snapshot
Take a snapshot using your camera. And with the newly added “Annotation” feature, you can now first annotate on the live image before taking a snapshot of the annotated image.
Note: The Annotation feature is only functional in Snapshot/Live View mode.

Video Recording
With Video Recording, you can record your material as it streams live.
Note: Due to system limitations of Chromebook, the highest resolution supported for video recording is 1280x720. And the recording time is capped at 15mins.
Time-lapse Shooting
With Time-lapse shooting, you can set a time interval and automate a shooting schedule for taking time-lapse video.

Scan QR Code
With this, Visualizer allows you to scan QR Codes.

Stop Motion
Create stop motion videos easily with this feature.

Settings
Access Snapshot’s settings here.

Full Screen
Click this to enter Full Screen mode.

Review Mode
Here, you can save the snapshots you’ve taken as PDF files, or, download and save them onto your computer’s hard drive.
Visualizer (Chrome) hotkeys chart available:
